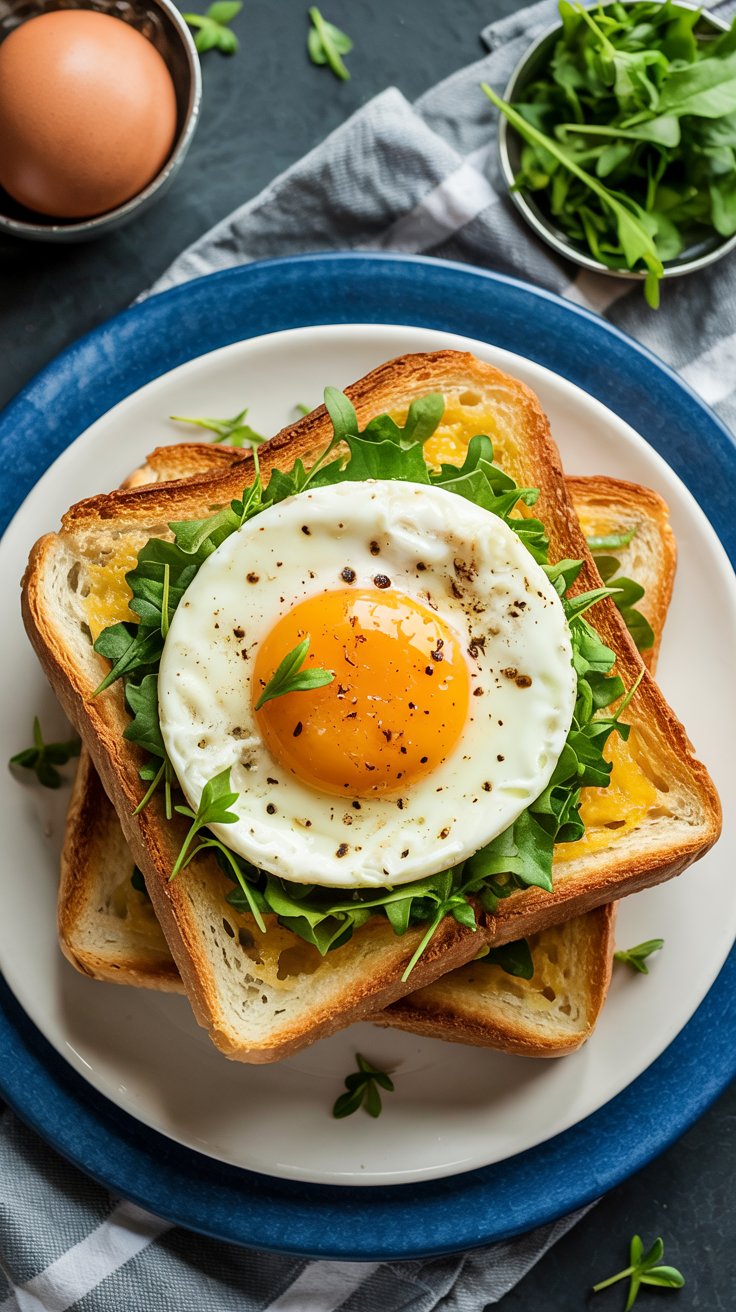
Air Fryer Egg and Cheese Toast
Mornings can be CHAOTIC. You’re trying to find matching socks, get everyone out the door, and somehow feed yourself a decent breakfast that isn’t just a sad, lonely granola bar. Well, let me introduce you to my latest obsession, the absolute game-changer for busy mornings: the Air Fryer Egg and Cheese Toast.
It’s crispy, gooey, and packed with protein, and the best part? It comes together in minutes with barely any cleanup. Seriously, this recipe is a lifesaver!
Ingredients for: Air Fryer Egg and Cheese Toast
You won’t need much, which is the beauty of it! Here’s what to grab:
- 2 slices of bread (I’m a big sourdough fan for this, but Texas toast or any thicker sliced bread works wonders!)
- 2 large eggs
- 1/2 cup shredded cheese (cheddar, mozzarella, a fun Mexican blend… you do you!)
- 1 tablespoon butter, softened
- Salt and pepper, to taste
- Optional extras: a sprinkle of chives, a dash of hot sauce, or some everything bagel seasoning.
Instructions
This is so easy, you’ll have it memorized after the first time.
- First things first, let’s prep our bread. Go ahead and lightly butter one side of each slice.
- Now, grab a spoon and gently press down in the center of each non-buttered slice to create a little well or indent. This is where our egg is going to live, so make sure it’s deep enough to hold it!
- Carefully crack one egg into the well of each slice of bread. Don’t worry if a little bit of the egg white runs over the side, it’s all part of the rustic charm, right?
- Time for the best part! Sprinkle generously with your cheese, salt, and pepper. Go on, don’t be shy with that cheese.
- Gently place your toasts into the air fryer basket, trying not to overcrowd it. Set your air fryer to 350°F (about 175°C) and cook for about 6–8 minutes.
- The exact time will depend on your air fryer and how runny you like your yolks. I like mine a little jammy, so 7 minutes is my sweet spot. Keep an eye on it!
- Once the cheese is melted and bubbly and the egg is cooked to perfection, carefully remove the toasts from the air fryer. Top with your favorite extras, and dive in!
Cook and Prep Times
- Prep time: 5 minutes
- Cook time: 6–8 minutes
- Total time: About 13 minutes
Nutritional Information
Just a little disclaimer: This is just an estimate! The final numbers can vary based on the specific bread, cheese, and butter you use.
- Calories: approx. 350 kcal per toast
- Protein: 18g
- Carbohydrates: 25g
- Fat: 19g
Frequently Asked Questions
Can I use any type of bread for this?
While thicker slices like Texas toast or sourdough are great because they hold the egg better, you can totally use regular sandwich bread. Just be a little more gentle when you press down to make the well for the egg.
Do I need to preheat my air fryer?
Honestly, for this recipe, I usually don’t! It’s so quick that it’s not really necessary, and the toast still gets perfectly crispy. If you’re an avid pre-heater, though, go for it, just shave a minute or two off the cooking time and check it early.
How do I keep the egg from running everywhere?
The little well you press into the bread is key! Press down firmly but gently to create a good indent. Using large eggs (not extra-large or jumbo) also helps them fit better in the space. A little spillage is okay, though it just gets crispy and delicious in the air fryer!

u003cstrongu003eAir Fryer Egg and Cheese Toastu003c/strongu003e
Ingredients
- 2 slices of bread (I’m a big sourdough fan for this, but Texas toast or any thicker sliced bread works wonders!)
- 2 large eggs
- 1/2 cup shredded cheese (cheddar, mozzarella, a fun Mexican blend… you do you!)
- 1 tablespoon butter, softened
- Salt and pepper, to taste
- Optional extras: a sprinkle of chives, a dash of hot sauce, or some everything bagel seasoning.
Instructions
- First things first, let’s prep our bread. Go ahead and lightly butter one side of each slice.
- Now, grab a spoon and gently press down in the center of each non-buttered slice to create a little well or indent. This is where our egg is going to live, so make sure it’s deep enough to hold it!
- Carefully crack one egg into the well of each slice of bread. Don’t worry if a little bit of the egg white runs over the side, it’s all part of the rustic charm, right?
- Time for the best part! Sprinkle generously with your cheese, salt, and pepper. Go on, don’t be shy with that cheese.
- Gently place your toasts into the air fryer basket, trying not to overcrowd it. Set your air fryer to 350°F (about 175°C) and cook for about 6–8 minutes.
- The exact time will depend on your air fryer and how runny you like your yolks. I like mine a little jammy, so 7 minutes is my sweet spot. Keep an eye on it!
- Once the cheese is melted and bubbly and the egg is cooked to perfection, carefully remove the toasts from the air fryer. Top with your favorite extras, and dive in!