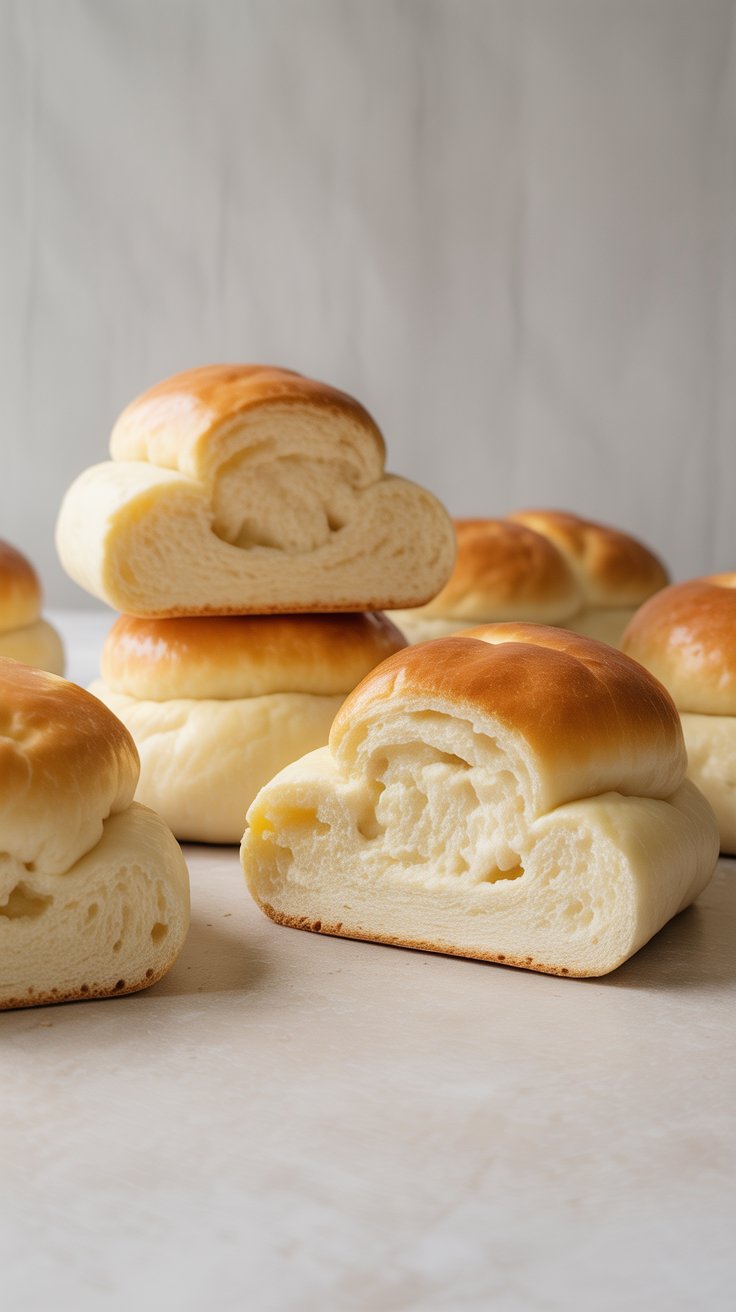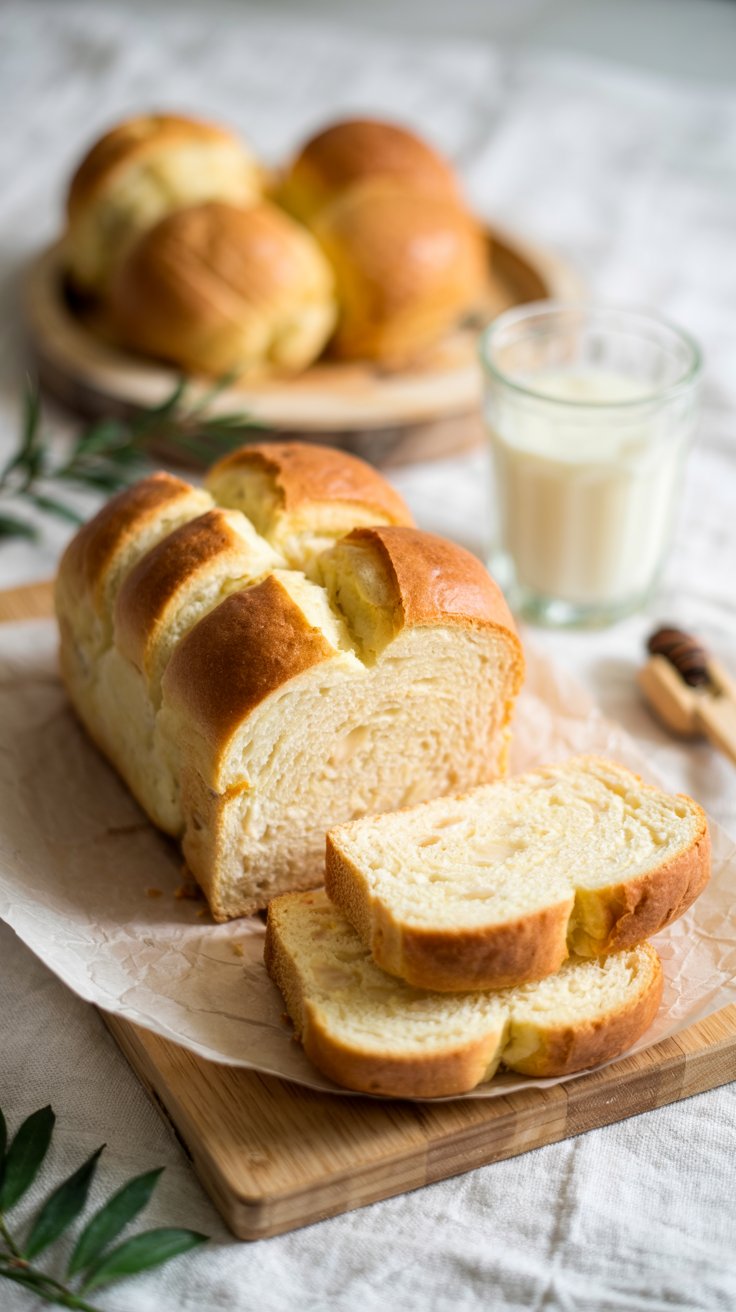
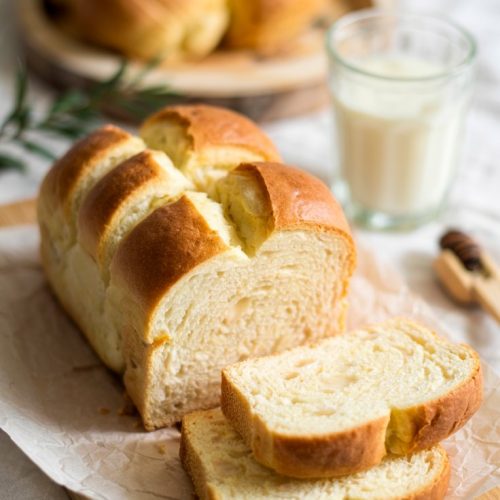
Yogurt Bread
Yogurt Bread is a simple, reliable loaf with a soft crumb and light tang from plain yogurt. It’s sturdy enough for sandwiches, easy enough for a weeknight bake, and makes excellent toast the next morning. Below you’ll find a straightforward recipe that doesn’t ask for fancy techniques, just a little time and a warm kitchen.
Ingredients for this Yogurt Bread
- 3 1/2 cups bread flour (about 420 g)
- 1 cup plain Greek yogurt, room temperature (240 g)
- 1/2 cup warm water, about 100 to 110°F (120 ml)
- 2 1/4 teaspoons instant yeast (7 g)
- 1 tablespoon honey (15 g)
- 1 1/2 teaspoons fine salt (9 g)
- 2 tablespoons olive oil or neutral oil (30 g)
- Optional: 1 egg beaten with 1 teaspoon water for a shiny top
Instructions
- Wake up the yeast. In a small bowl or measuring cup, stir the warm water and honey. Sprinkle in the yeast. Let it sit for 5 minutes until foamy. If it stays flat, your yeast may be inactive. Try again with a fresh packet.
- Mix the base. In a large bowl, whisk together the yogurt, oil, and salt. Pour in the foamy yeast mixture and stir to combine.
- Bring it together. Add the flour in 2 to 3 additions, stirring with a sturdy spoon until a shaggy dough forms. It should be slightly sticky but not soupy. If it’s very wet, sprinkle in 1 to 2 tablespoons more flour.
- Knead. Turn the dough onto a lightly floured surface and knead 8 to 10 minutes, or use a stand mixer with the dough hook on medium-low for 5 to 6 minutes. You’re aiming for a smooth, elastic dough that’s just a touch tacky. It will feel soft because of the yogurt. That’s good.
- First rise. Place the dough in a lightly oiled bowl, turning once to coat. Cover and let rise in a warm spot until doubled, 60 to 75 minutes. A gently warmed oven (turned off) or a sunny counter works well.
- Shape. Lightly oil a 9 x 5 inch loaf pan. Turn out the dough, pat it into a rough rectangle, then roll it up into a snug log. Pinch the seam, tuck the ends, and set it seam side down in the pan.
- Second rise. Cover and let rise 35 to 45 minutes, until the dough domes about 1 inch above the rim. Preheat the oven to 375°F (190°C) near the end of this rise.
- Bake. Brush the top with egg wash if using. Bake 35 to 40 minutes, until deep golden and the loaf sounds hollow when tapped. An instant-read thermometer should read 195 to 200°F in the center. If the top browns too quickly, tent loosely with foil for the last 10 minutes.
- Cool. Let the loaf rest in the pan for 10 minutes, then move to a wire rack to cool at least 1 hour before slicing. Hard to wait, I know. Warm bread and butter is a siren song, but the crumb finishes setting as it cools.
- Store. Keep at room temperature, wrapped, for 2 to 3 days. For longer storage, slice and freeze. Toasts up beautifully straight from the freezer.
Cook and Prep Times
- Active prep: 20 minutes
- First rise: 60 to 75 minutes
- Second rise: 35 to 45 minutes
- Bake: 35 to 40 minutes
- Total time: About 2 1/2 to 3 hours
Nutritional information
Approximate per slice, 1 of 12 slices:
- Calories: ~165
- Carbohydrates: ~33 g
- Protein: ~6 g
- Fat: ~3 g
- Fiber: ~1 g
- Sodium: ~300 mg
These values are estimates and will vary with ingredient brands and exact slice size.
Frequently asked questions
Can I use regular yogurt instead of Greek yogurt?
Yes, but regular yogurt is thinner. Start with 1 cup regular yogurt and reduce the added water to 1/4 cup. If the dough still feels very sticky, sprinkle in an extra tablespoon or two of flour while kneading. Aim for soft and slightly tacky, not gluey.
Can I make this with some whole wheat flour?
Replace up to 50 percent of the bread flour with whole wheat flour. Add a tablespoon or two more water if the dough feels stiff, since whole wheat absorbs more. The loaf will be a bit heartier and slightly denser, with a lovely nutty flavor.
What if I don’t have instant yeast?
Use the same amount of active dry yeast. Bloom it in the warm water and honey for 5 to 10 minutes until foamy, then proceed. Rise times can vary a little, so use the dough’s look and feel as your guide. When it’s puffy and doubled, you’re ready for the next step.
Yogurt Bread
Ingredients
- 3 1/2 cups bread flour (about 420 g)
- 1 cup plain Greek yogurt, room temperature (240 g)
- 1/2 cup warm water, about 100 to 110°F (120 ml)
- 2 1/4 teaspoons instant yeast (7 g)
- 1 tablespoon honey (15 g)
- 1 1/2 teaspoons fine salt (9 g)
- 2 tablespoons olive oil or neutral oil (30 g)
- Optional: 1 egg beaten with 1 teaspoon water for a shiny top
Instructions
- Wake up the yeast. In a small bowl or measuring cup, stir the warm water and honey. Sprinkle in the yeast. Let it sit for 5 minutes until foamy. If it stays flat, your yeast may be inactive. Try again with a fresh packet.
- Mix the base. In a large bowl, whisk together the yogurt, oil, and salt. Pour in the foamy yeast mixture and stir to combine.
- Bring it together. Add the flour in 2 to 3 additions, stirring with a sturdy spoon until a shaggy dough forms. It should be slightly sticky but not soupy. If it’s very wet, sprinkle in 1 to 2 tablespoons more flour.
- Knead. Turn the dough onto a lightly floured surface and knead 8 to 10 minutes, or use a stand mixer with the dough hook on medium-low for 5 to 6 minutes. You’re aiming for a smooth, elastic dough that’s just a touch tacky. It will feel soft because of the yogurt. That’s good.
- First rise. Place the dough in a lightly oiled bowl, turning once to coat. Cover and let rise in a warm spot until doubled, 60 to 75 minutes. A gently warmed oven (turned off) or a sunny counter works well.
- Shape. Lightly oil a 9 x 5 inch loaf pan. Turn out the dough, pat it into a rough rectangle, then roll it up into a snug log. Pinch the seam, tuck the ends, and set it seam side down in the pan.
- Second rise. Cover and let rise 35 to 45 minutes, until the dough domes about 1 inch above the rim. Preheat the oven to 375°F (190°C) near the end of this rise.
- Bake. Brush the top with egg wash if using. Bake 35 to 40 minutes, until deep golden and the loaf sounds hollow when tapped. An instant-read thermometer should read 195 to 200°F in the center. If the top browns too quickly, tent loosely with foil for the last 10 minutes.
- Cool. Let the loaf rest in the pan for 10 minutes, then move to a wire rack to cool at least 1 hour before slicing. Hard to wait, I know. Warm bread and butter is a siren song, but the crumb finishes setting as it cools.
- Store. Keep at room temperature, wrapped, for 2 to 3 days. For longer storage, slice and freeze. Toasts up beautifully straight from the freezer.